Multi-Factor Authentication Requirement and User Setup
CONTENTS
New MFA Requirement for Sysadmin Accounts
- Beginning March 2, 2026, all System Admin SIS accounts will be required to have MFA/SSO enabled in order to access Genesis SIS. Any of the following Genesis User account setups will allow System Admins to logon once the requirement is enabled:
- User has Authentication Type of "Single Sign on" or "Active Directory".
- User has an enabled MFA Provider from the Setup>Security>Single Sign-on and MFA screen set as MFA Provider.
- User has the "Force Google SSO" checked and has a Google Email Address on their account
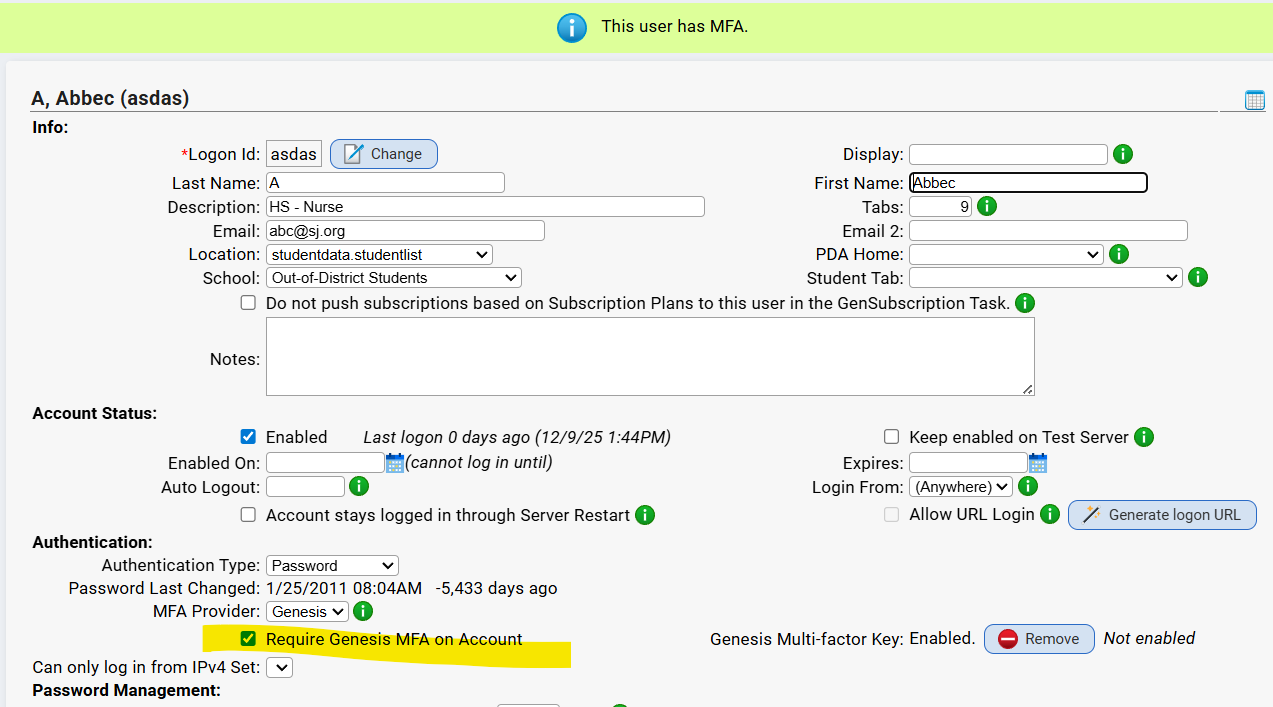
- User has MFA Provider set to "Genesis" and has 'Require Genesis MFA on Account' checked off.
- Once your System Admin accounts in Genesis have MFA/SSO enabled, we recommend turning on this new requirement ahead of the March 2 deadline. To do so, go to SETUP → SECURITY → POLICY and select “Sysadmins must have MFA/SSO set up on their SIS User account to log in.” Our team is available to support you with setup and answer any questions that come up.
User Setup
This document guides the user through completing the Genesis Two-Factor setup when the "Require Genesis MFA on Account" option is checked under System > Security > Search for User.
A. User Requirements:
1. User must have Require Genesis MFA on Account enabled. See FAQ for how to mass update users.
2. Have an Authenticator App installed on your smartphone, computer, or browser such as apps provided by Google or Microsoft. The directions below include steps on authenticating via mobile device using the Google Authenticator app.
B. Logging into Genesis:
1. Navigate to your district Genesis login page
2. Enter your username and password.
When "Require Genesis MFA on Account" is checked, the user will not be able to access any other tabs until MFA is set up. When setting up for the first time, you will see this screen below:
3. Click the Enable One Time Password Authentication button to begin. You will be presented with the following screen, which has information needed for the authenticator app:

4. The information presented here must be used to setup the authenticator app. From here, the user can either manually type or copy/paste the Secret Key into an authenticator.
Alternatively, you may click the Show QR Code button and the presented QR code can be scanned by your authenticator app for quicker setup.
5. Once the authenticator is setup, click the Enable One Time Password button to complete the setup for your account:

6. Lastly, enter the 6 digit code from the authenticator into the prompt and click OK to test (you will be asked to enter a random 6-digit code when logging into Genesis going forward):
Note: If you have multiple 6-digit codes listed as "Genesis: Login" the newest code should be the last one in the list.
You will see the following prompt when the setup has been successfully completed:

7. You will be brought to Security Settings and Preferences page. Click Close User Options to continue into Genesis.
MFA Requirement FAQ
1. When will the requirement take effect for 'sysadmin' Genesis accounts?
System Admin accounts will be required to login using MFA starting on March 2, 2026.
2. When will the requirement take effect for all other users?
Not at this time. The requirement for non-system admin accounts is still to be determined.
3. Will this requirement include Parent and Student Portal accounts?
No, there are no plans to enforce this requirement for Parents or Student accounts at this time.
4. Why is Genesis enforcing Multi-Factor Authentication?
Enabling MFA significantly reduces the risk of unauthorized access and helps safeguard sensitive information such as payroll and personal details. To strengthen your data security, Genesis will be enforcing Multi-Factor Authentication (MFA) as a standard in our Student Information System (SIS).
5. Would having a Single-Sign-On or Active Directory in place be enough to satisfy the MFA Requirement?
Yes. In general, users will be required to login through any type of authentication, other than the Username & Password method. If the user does not have any of those items in place, they will be required to login via the built-in Genesis MFA (see User Setup section above to read about this process).
6. Do we have to implement a 3rd party security system such as Microsoft Entra, Cisco Duo, or Okta?
No, Genesis has a built-in MFA in place that will satisfy the MFA Requirement. Note: See the User Setup section above for details on using the Genesis MFA.
7. Will Turnstile, or 'kiosk' users be impacted by this requirement?
No, the Genesis MFA Requirement will not be enforced for logins which are only to check-in students daily. These accounts are typically used throughout the school day and do not represent actual staff members. These users must NOT be a 'sysadmin' account. Any super users (logins with the "sysadmin" access role) will still have the MFA requirement enforced, regardless of the purpose for the account.
8. Will the accounts that have the Allow URL Login still function properly?
Yes. The MFA requirement will not impact the ability to login using a URL. Click Here for more details on this feature.
9. Can I mass-assign the Require Genesis MFA on Account checkbox for all sysadmin users?
To mass apply the Require Genesis MFA on Account setting to users, you may do so using the Mass Update button found on the Setup > Security > Users screen by checking off the users to be updated and then using the tool to run the update.
10. Does this mean users must use a mobile device for signing in?
No, the authenticator app can be installed directly on your computer.
Was this article helpful?
That’s Great!
Thank you for your feedback
Sorry! We couldn't be helpful
Thank you for your feedback
Feedback sent
We appreciate your effort and will try to fix the article