I. Download or Export the Report Writer (.rw) File
First, you will need to save the .rw file onto your local workstation. Report Writer files can be obtained from the Genesis Custom Reports Library or by exporting a custom report from within Genesis (see below).
How this is done depends on the version and type of browser you are using. Most internet browsers will let you left-click the "Download Report" links you see in the report library, in order to save to your local machine. For other browsers like Internet Explorer, you may have to right-click the "Download Report" link, then click "Save Link As" or "Save Target As".
Make sure to the Save As File Type drop down is set to All Files and then add a .rw to the file name as seen below.

To download a custom report as this .rw file from Genesis for installing on another Genesis site:
- Locate the Custom Report in Genesis under the Reports tab
- Click the modify/pencil button to edit the Report
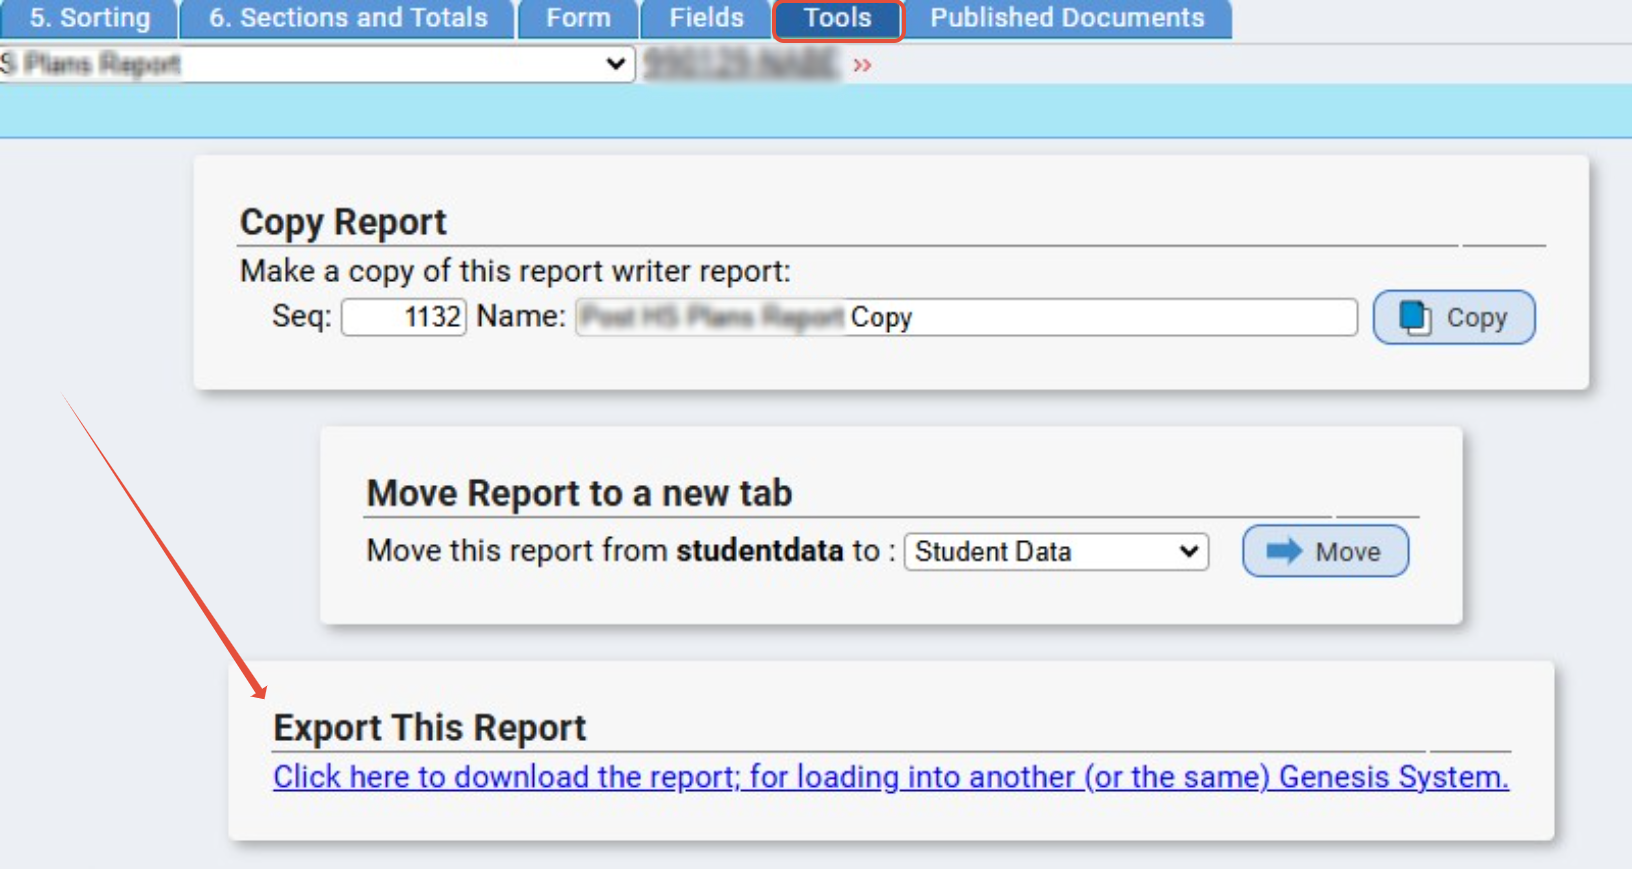
- Visit the Tools tab of the Report Writer
- Use the Click Here to Download tool to Export This Report
- Save the .rw file to your computer files
Once you have successfully saved the .rw file you can import it into Genesis.
II. Import the Report Writer (.rw) File to Install the Report
Navigate to the Report Writer module in Genesis. Once there, click on the Import sub tab.

Click Browse... or Choose File... to look on your computer for the .rw file you downloaded. You can insert a specific report number and/or override the report's Name if desired.
Click Upload File to finish. The newly imported report should now appear in your Reports List. It can be run against your district's data right away, unless it first needs to be configured.
To change which Module's "Reports" tab the Custom Report is listed under:
- Locate the Custom Report in Genesis under the Reports tab
- Click the modify/pencil button to edit the Report
- Visit the Tools tab of the Report Writer
- Use the Move Report to a new Tab option to adjust the Module
- Click Move to save the changes
Was this article helpful?
That’s Great!
Thank you for your feedback
Sorry! We couldn't be helpful
Thank you for your feedback
Feedback sent
We appreciate your effort and will try to fix the article