You can import, manually add, and export student photos in Genesis.
TABLE OF CONTENTS
- Viewing an Individual Student's Photo
- Technical Specifications
- How to Upload an Individual Student's Photo
- How to Remove an Individual Student's Photo
- How to Import a File of Student Photos
- How to Download the Student Photos
- FAQ
Viewing an Individual Student's Photo
A student record can contain a photo that appears in several places in Genesis.
- Student Data>Modify Student>Demographics>Required screen:

- Student Information Bar (This is the bar that with information that you see when modifying a student):

- A built-in Report called - Student Photos Report 21420 Student Photos - Photo Sheet
Technical Specifications
- A student photo must be an industry standard JPG file; that is a resolution of about 150x200 resolution.
- Genesis will automatically scale the photos to 86x114 on most screens in Genesis; getting your images exactly to 150x200 is not important.
- The most important thing about the photos is the disk size. You do not want to attach a 4 megabyte photo to a student. Photos of about 40K are reasonable.
How to Upload an Individual Student's Photo
To attach a single photo that is on your computer to an individual student in Genesis, perform these simple steps:
- Navigate to the Student Data>Modify Student>Demographics>Required screen of the student you wish to attach the photo to.
- Click the "Manage Picture" button:

- On the next screen, click "Choose File" to locate the picture on your local device and click "Upload File" to upload the picture to the student:

How to Remove an Individual Student's Photo
- Navigate to the Student Data>Modify Student>Demographics>Required screen of the student you wish to attach the photo to.
- Click on the Manage Picture button.

- Click "Remove Photo":

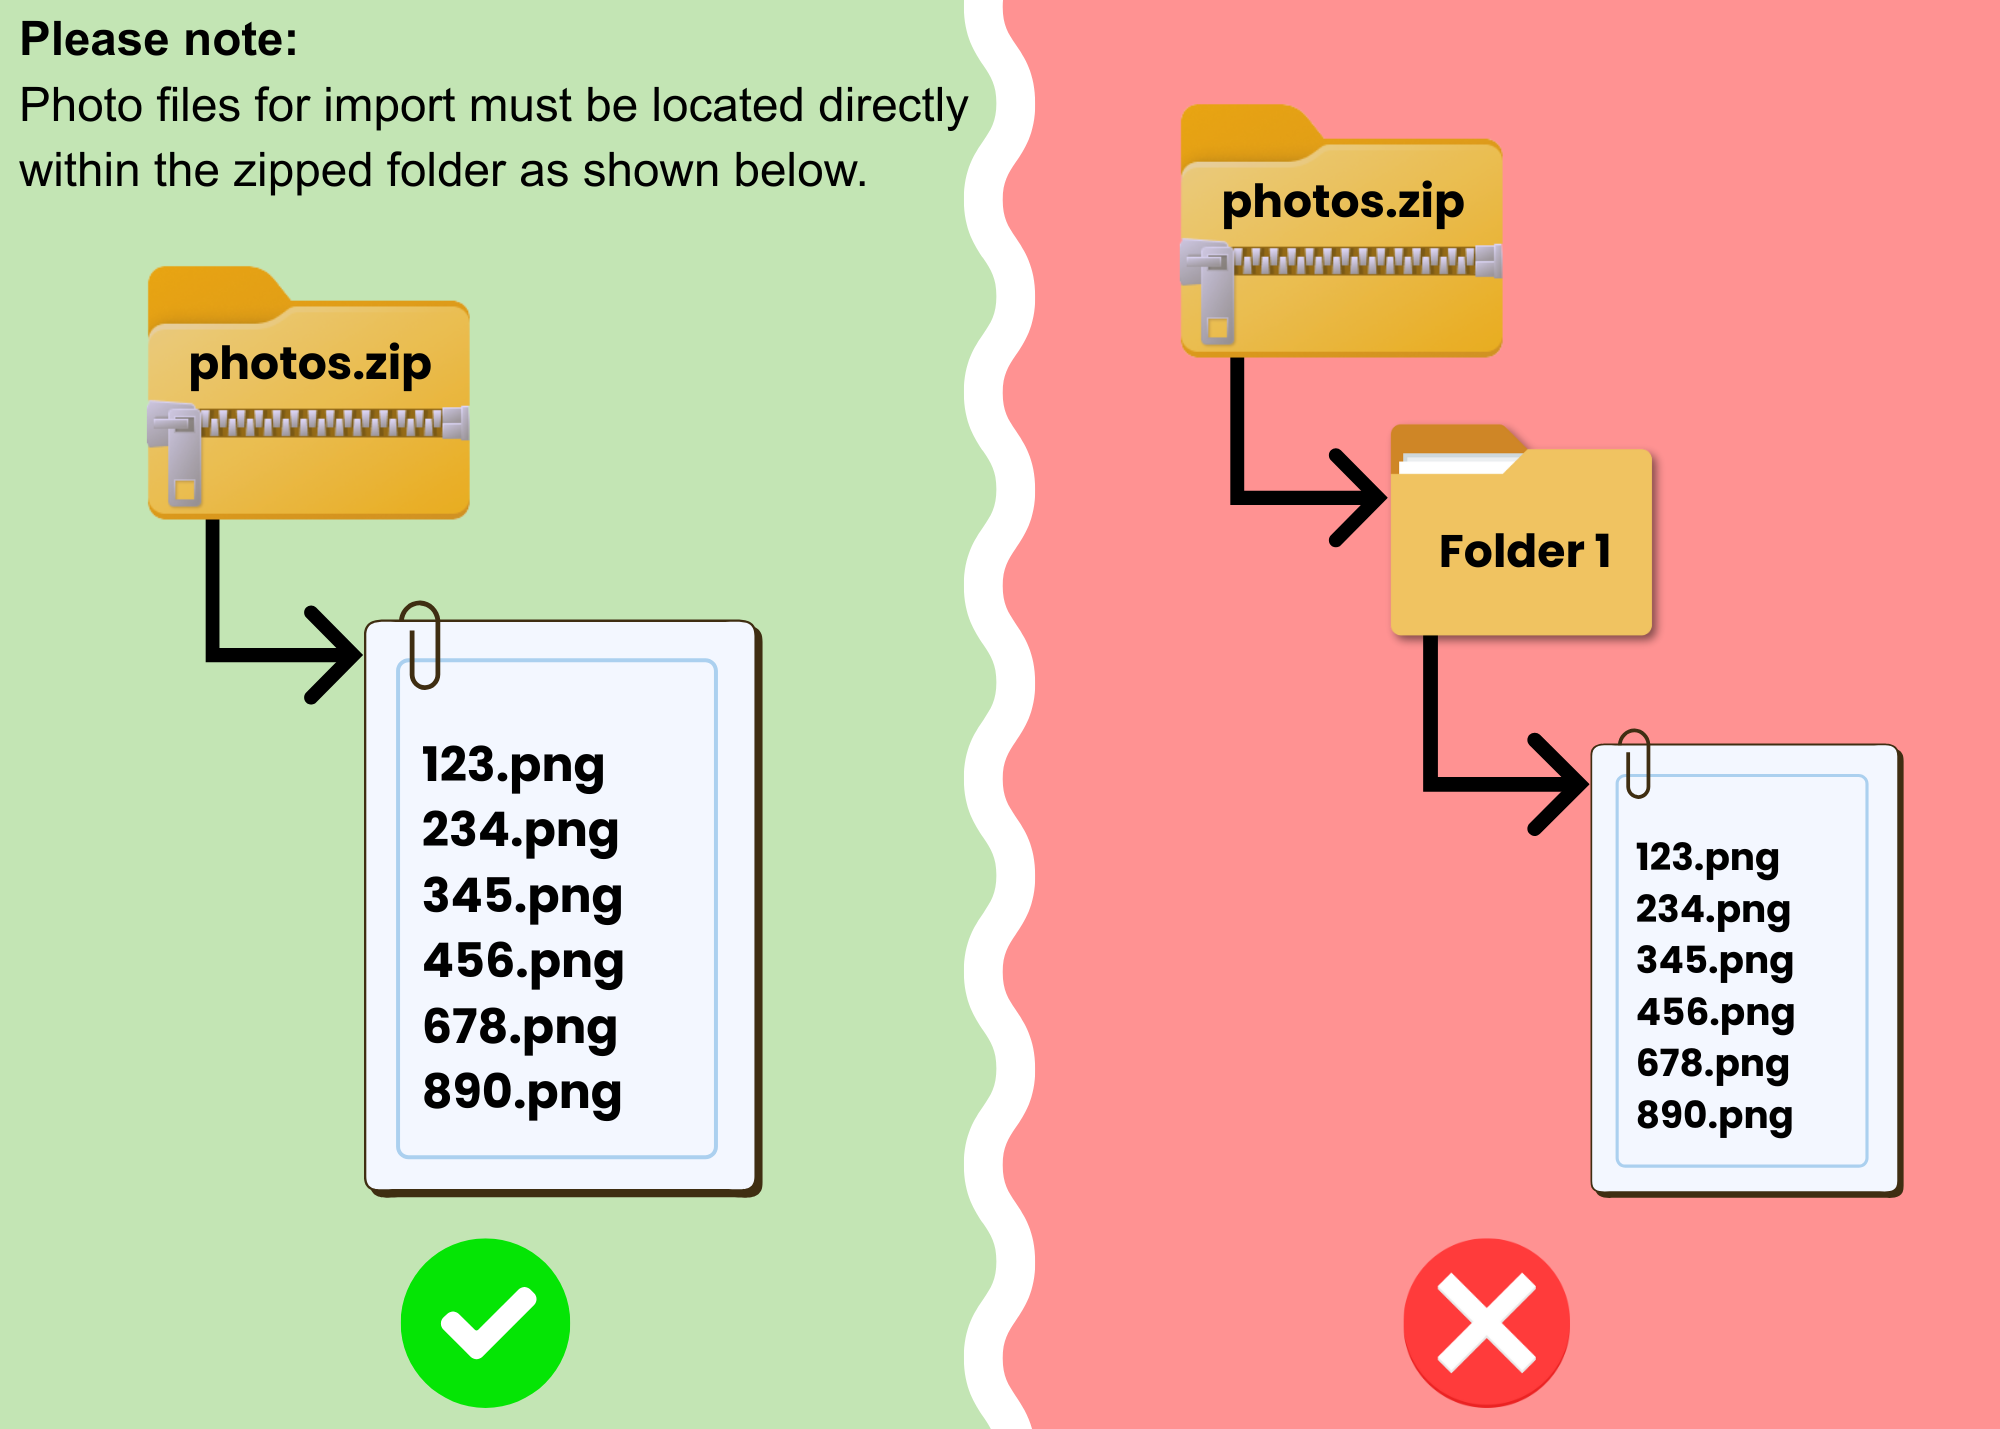
How to Import a File of Student Photos
If you have a CD, DVD, or digital file/zip file from the company, you can upload those pictures all at once.
IMPORTANT NOTE: The pictures in the file must be named studentid.jpg or statestudentid.jpg. For example: if a student has the student id of 155324; the file name would be 155324.jpg.
STEPS
- If needed, to first create the zip file, use an archive utility of your choice to zip the pictures.
- Navigate to the Admin>Students>Manage Student Photos screen.

- Using the onscreen instructions, locate the file on your local device with the "Choose File" option.
IMPORTANT NOTE: Files can be imported with local IDs or State IDs. You can toggle the "Import using State IDs" option on or off depending on the naming structure provided to you. If the files are named with local student IDs, leave it unchecked. If the files are named with state IDs, check it off. - Click "Upload Zip File" to upload your zip file.
How to Download the Student Photos
- On the Admin>Students>Manage Student Photos tab, click the "Download the Photos as studentPhotos.zip" button.

FAQ
Where On My Server are the Photos Stored?
If your district is not hosted on the ASP; you can find out where on your server Genesis stores the student pictures by performing these steps:
- Login as a Genesis Admin
- Go to the core.paths screen.
- The photos are stored in the studentPhotos directory ; under the directory specified in the Data Path field.
I uploaded a Zip File containing the student's photos but nothing is uploading.
Make sure that you have named the individual student photos within the zip file correctly. For example, the format is either studentid.jpg or statestudentid.jpg. So, if a student's local ID is 12345, the file would be coded as 12345.jpg.
Also, make sure that the zip file itself simply contains the jpeg files and it does not contain an additional folder within it etc. That can cause the upload to not work.

Can I add a watermark to the photos for the parent portal?
Yes, you can set up a watermark via Parent Access>Setup>Settings>School Settings>Student Summary with the "Display Watermark text on Student photo" option.
What are the specifications?
- A student photo must be an industry standard JPG file; that is a resolution of about 150x200 resolution.
- Genesis will automatically scale the photos to 86x114 on most screens in Genesis; getting your images exactly to 150x200 is not important.
- The most important thing about the photos is the disk size. You do not want to attach a 4 megabyte photo to a student. Photos of about 40K are reasonable.
Was this article helpful?
That’s Great!
Thank you for your feedback
Sorry! We couldn't be helpful
Thank you for your feedback
Feedback sent
We appreciate your effort and will try to fix the article