Overview
The Genesis Reunification module is a built‑in feature available to all school districts at no additional cost, designed to safely and efficiently account for and aid in the Reunification process. Modeled after the Standard Reunification Protocol by the I Love You Guys Foundation, it is designed to be a key part of school districts School Safety & Security Plans.
Genesis has been invited to present this module at state‑wide education and law enforcement conferences, sharing strategies with school administrators and law‑enforcement partners. The module supports coordinated procedures that align with law‑enforcement guidance, ensuring districts implement both educational and public-safety best practices.
District Training
The Genesis Client Services team provides complimentary, in-district or virtual training on this module, reflecting our commitment to never charging additional fees for school safety solutions within our product line. Training is typically about an hour in length.
To arrange training you can email Mike Nicosia, VP of Client Services at mnicosia@genesisedu.com or enter a support ticket.
Using The Module
As with all parts of Genesis, the Reunification Module is a secure location that will have to be added in whole to the necessary roles in the system.
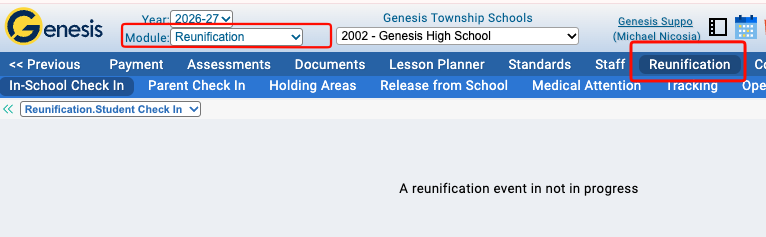
Navigating to the Module: You can navigate to the module by going to the Reunification Tab (or Reunification) drop down in the Module Menu.
Launching an Event
When you first arrive on the reunification screen, all users will see the message "A reunification event is not in progress". This message appears because the first step in activating the module is for someone to open an event.
As you work the Genesis Reunification module into your Safety & Security Plan, it is suggested to determine who in the district should have the ability to launch a reunification event. This specific security permission is recommended to only be provided to those who are authorized to launch an event in the district.
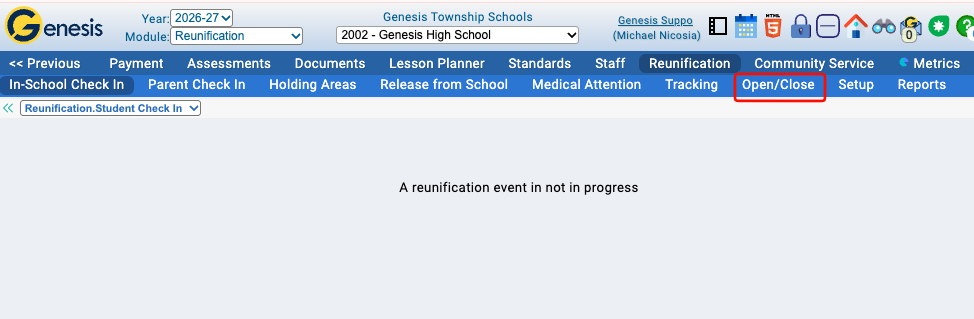
Step 1 - Launching the Event - To launch an event, a user would want to go to click Open/Close tab. This will take you to the Open/Close event screen.
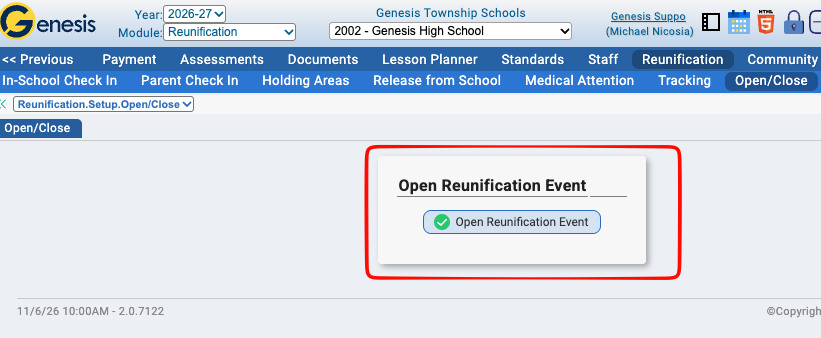
To launch or open an even, click the "Open Reunification Event" button
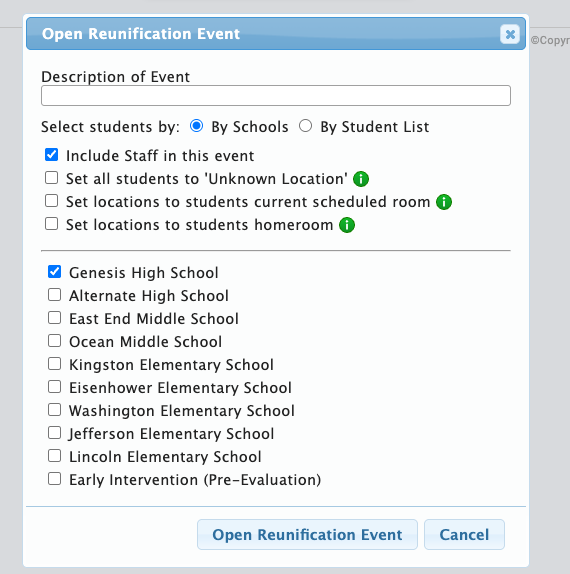
When you click the Open Reunification Event button, it will bring you to the Open Event screen where you can make some determinations on students and school based on your unique circumstance.
- Description of Event: This field can capture any information.
- Select students by: You can either run the event by School or Student List. School is the most common and the default setting.
- Include Staff Checkbox: By default, the include Staff in this event button is checked. This will pull in any staff in the Genesis SIS assigned to the school you select next. If your event situation does not call for staff to be included, you can uncheck included staff.
- Setting Location: You will have to make a decision of where to set the student location to when the Reunification Event opens. See below for a full description and recommendations on location setting options.
- School: You can select one or more schools to include in the module
Setting Location Options
Three options exist as starting points for where students are when the event opens:
- Set all students to 'Unknown Location' - This is the Genesis recommended setting. This will set ALL students and staff location to unknown and then you will use the system to begin to check students and staff into various locations.
- Set locations to students current scheduled room - This option will set students to wherever their schedule says they should be whenever the open button is pressed. Caution - it will not account for students that are out of class in the bathroom, nurse, etc. Also, the system will look at where they should be at the time the button was pressed. For example, if you lock down at 10 am, and classes change at 10:15, obviously they wouldn't in real life but the system won't know that. It will always place them in the room it thinks they should be in when the button is pressed.
- Set locations to students homeroom - This option will set students to wherever their Homeroom assignment is. Caution - it will not account for students that are out of class in the bathroom, nurse, etc. Also, it will not account for any student that is pulled out for academic programming outside their homeroom.
Checking in Students & Staff
The first of the four main screens is called the School Check In Screen. This screen is designed for checking in your students and staff.
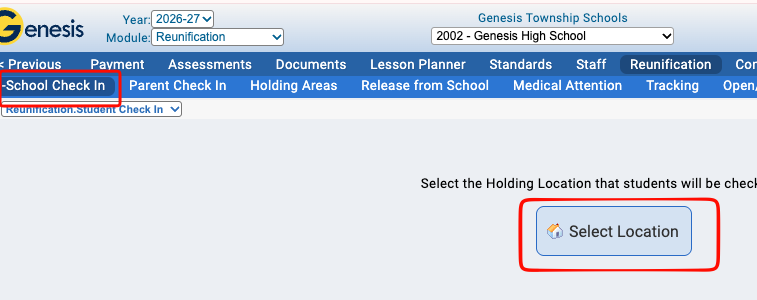
To use this screen you first want to select the specific location you would like to check students and staff in to. Locations can be pre-setup under the Reunfication > Setup > Locations tab.
It is recommended to list as many possibly locations in this screen as possible. This included both within the school, hospitals and reunification site locations. Below is an example from a Northern NJ district of their setup.
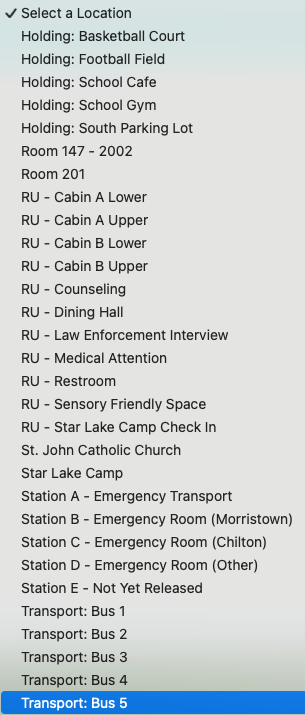
To select a location, click the Select Location button and you can pick from your populated list of locations to check students in to.
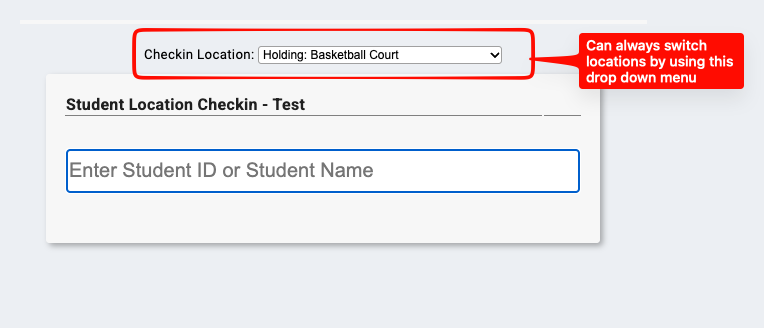
For example, if you were assigned to location 'Holding: Basketball Court" you can select that from the menu, hit update location and now your device will be able to check students in to that specific reunification location. (See Below)
Checking a Student or Staff Member In:
There are three ways to check in a student: Last Name, Student ID or Barcode
Barcode Check In - Simply Scan the ID Barcode and the student is now checked in. The Barcode must represent the Students ID Number.
Last Name or Entered ID Number Check In - Begin to type the first few letters of the Childs last name into the search field. The system will begin to pull up students and staff with that last name letter combination. Hit the "Check In" button to check the student in. The image below shows key information that will be displayed on the School Check In Tab.
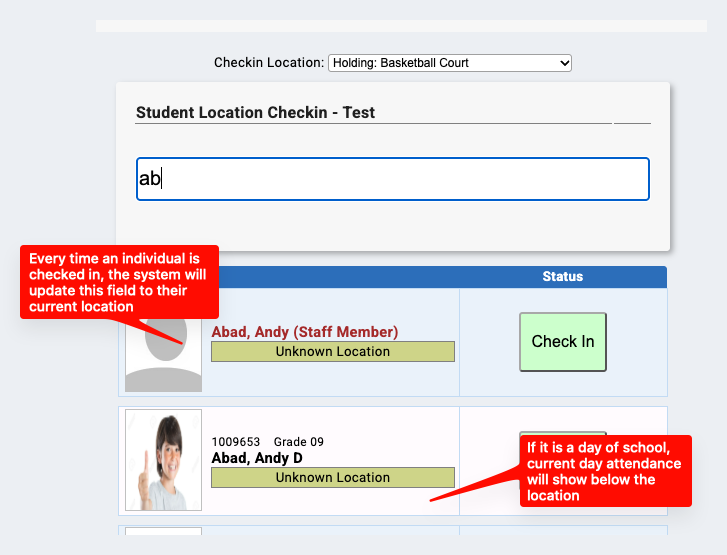
Tip: Many districts run multiple check in locations. For example, if you have to go off site, you can run one as students/ staff get to the school holding area, one as students get on the buses, one at the off site location and even multiple within the offsite location so you know where students are at all times. Each time a student or staff checks in it updates the system to their most recent location. For district admin, check out the Tracking Tabs that update every 15 seconds on progress of the reunification event.
Parent Check In
Parent Check in can be found right next to the School Check In Tab. It works near identical to student/staff check in by entering the first few letters of the students last name.
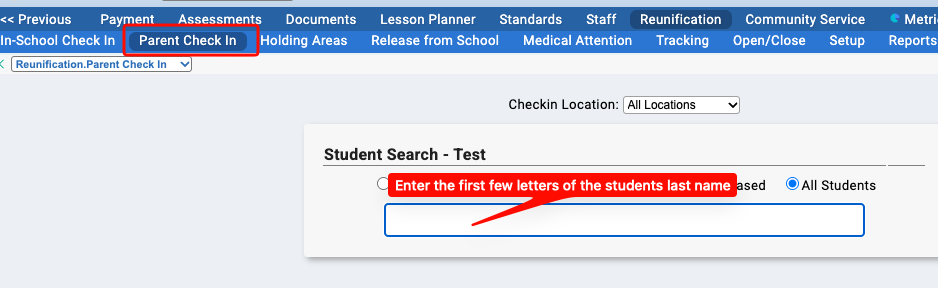
After location the student, hit the "Check In" Button which will bring you to the next stage of the Parent Check in Screen.
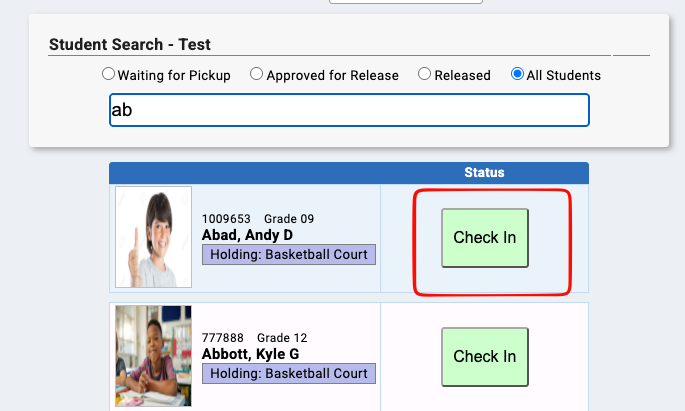
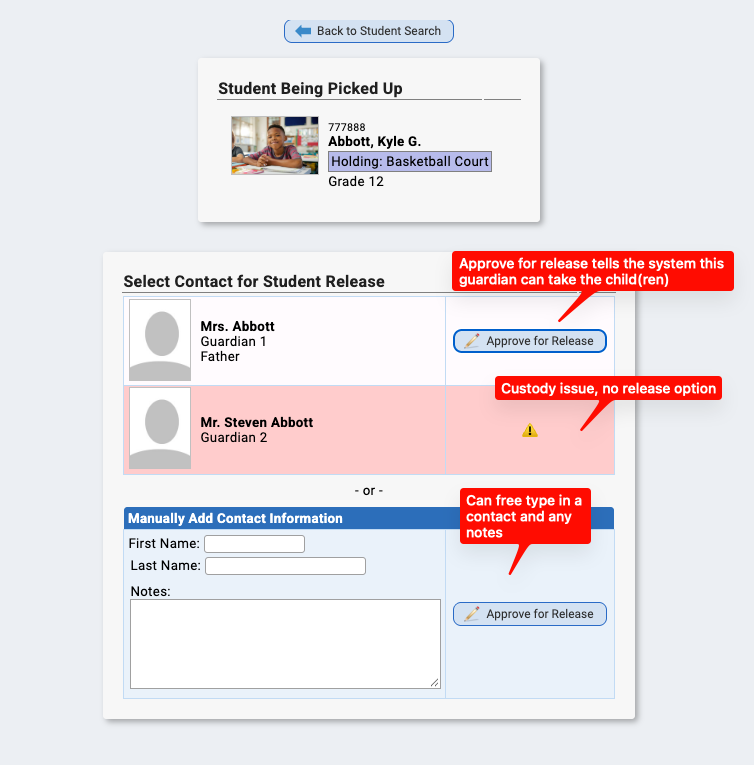
The Parent Check in Screen will show the following information:
- Any contact in Genesis permitted to pick up. If there is a custody issue already in the system, they will be flagged as shown below.
- Siblings that the parent may also want to pick up at the same time (can check them all out at once).
- The ability to free type in a contact if they don't show up in the regular contact area.
This step can be run in conjunction with Student/Staff Check In or before/after.
Holding Areas
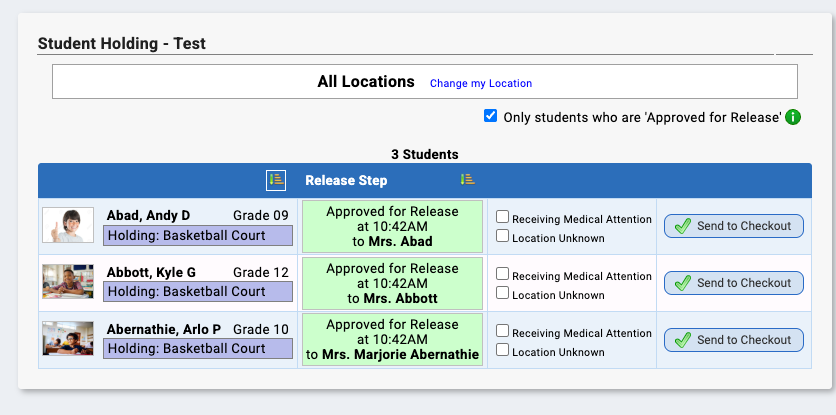
The Holding Areas Screen is designed to marry the information from the Student Check In Screen and Parent Check In. It is also designed to limit the need for walkie-talkies and radio communication.
As you can see below, it will tell you which students have parents waiting for them already. This screen updates every time a parent checks in. It will also show you the exact location where the child is to help ease runners in attempting to find the student at the Reunification site.
Once the student has been located at the reunification site, staff can hit "Send To Checkout" to enable the student to be checked out at the last step.
Release from School
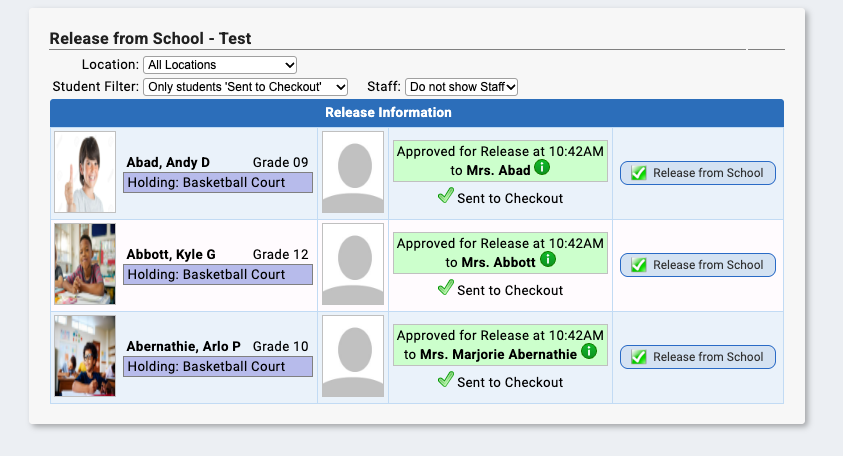
The Release From School Screen is designed for staff working the table/area where parents receive their children back. As the child is returned to the parent staff hit the "Release from School" button and it will mark the child as released.
If your district wishes to capture a signature, you can turn this setting on under Reunification > Setup > Settings.
Was this article helpful?
That’s Great!
Thank you for your feedback
Sorry! We couldn't be helpful
Thank you for your feedback
Feedback sent
We appreciate your effort and will try to fix the article