TABLE OF CONTENTS
- Differentiating between the Staff ID and the User ID/Logon ID:
- Creating the Genesis User/Logon ID
- Assigning the Staff Object to the User:
- Represents User
- If the Staff Object is Not Created Yet?
- Additional Articles
Differentiating between the Staff ID and the User ID/Logon ID:
The Genesis "User" (created/modified in Setup>Security>User) is what you use to log in to Genesis with. It will grant access to specific areas in Genesis, depending on how it is configured.
This is the same ID you see in the audit trail, each time a transaction is recorded.
The "Staff ID" (created/modified in Staff>Staff) is seen as an object, and holds information like demographics, teacher schedule, etc.
The staff object allows the Genesis user to be represented as an actual person working in the district.
This is done by assigning a staff member to the user account, granting the user access to:
- Teacher Gradebooks
- Posting attendance/grades as a teacher
- Webdesk
- Assuming a job role such as Nurse, Counselor, Teacher, etc.
Creating the Genesis User/Logon ID
To create a new user, which allows the user to log in to Genesis, you do so via Setup>Security>Users, with the "Add User" button.

Once the logon ID ("User") is created, you attach the relevant "Roles" to the Logon ID to allow the user access to specific screens within Genesis. This is up to the district to determine.
Assigning the Staff Object to the User:
Once the staff member is created, it is assigned through the Setup>Security>Users screen.
Perform a search on this screen in the "User Search" area.
Once you get results, click on either the Logon ID or the modify button to view the modify user screen:

There is a 'Staff Assigned' area at the bottom right hand corner of the modify user screen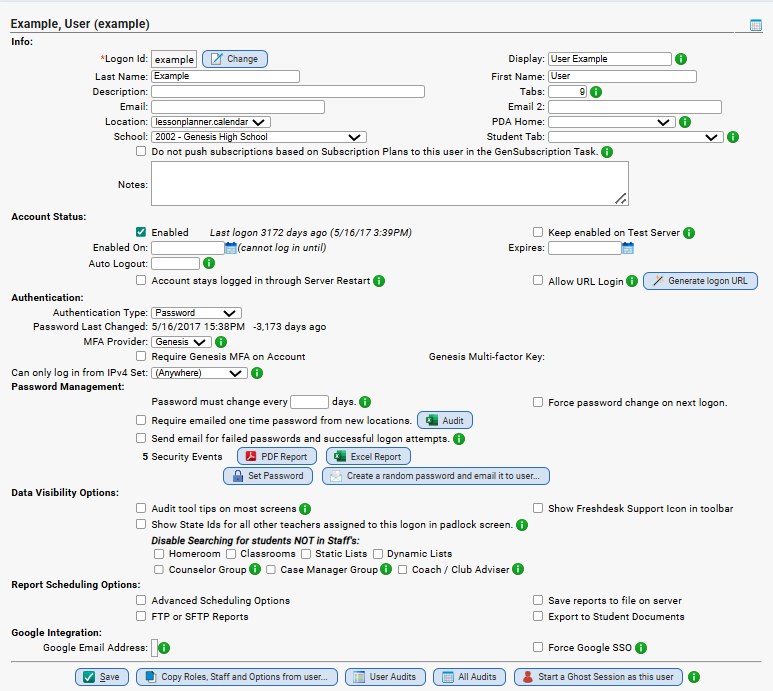
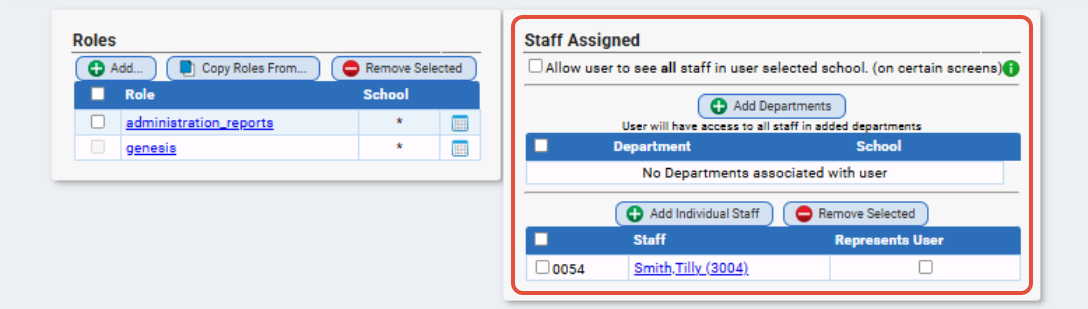
- Click the 'Add Individual Staff' button to open up a list of teachers whom you can add to you user in a pop up window
- And/or Click the "Add Departments" option to add all teachers in a department en masse.

- You can search for teachers on this list by name and school
- Check the box next to the teacher(s) name that you would like to add to the user and then click the 'Add' button
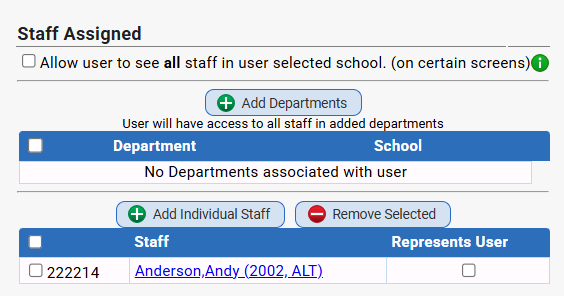
- The user now assumes the identity of that staff member
- A user can have more than one staff member assigned, and a staff member can be assigned to more than one user account
Represents User
You should check this off to indicate the staff ID you added to a logon ID is the user.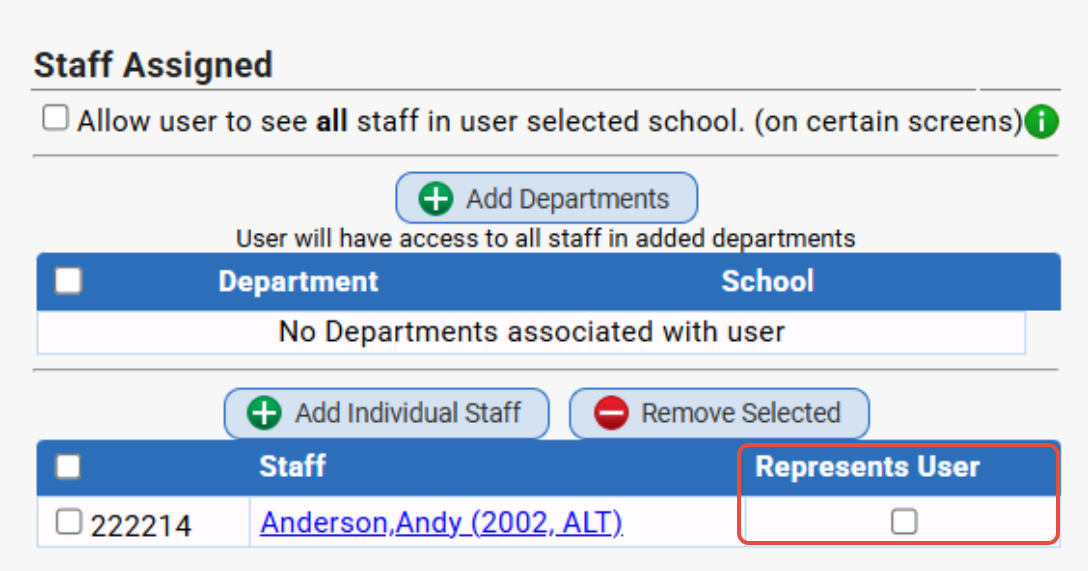
This option will extend to Lesson Planner, Genmessaging, Webdesk, Notes, Signatures, and Nurse access.
It will also define the "default" staff ID that will appear when you have go to tabs such as the Attendance>HR Attendance tab and Gradebook.
For example, if a user has 3 staff IDs tied to their account, after they set their own Staff ID to "represents user," when they log in to Gradebook, their name will appear first.
You can review and/or update this via Staff>Staff>Tools>Users to Staff.
If the Staff Object is Not Created Yet?
That means that the "Teacher/Staff ID" has not been created yet. Create the Staff ID via Staff>Staff>Add Staff. Once it's added in, you can continue adding the Staff object to the User (Logon ID) mentioned above.
Additional Articles
How to Give a New SIS Logon ID a New Password
Tying a Staff ID to a Genesis User Logon ID
How to Mass Update Selected Fields on Genesis Users
Second Authentication From New Locations
Two-Factor Authentication (2FA)
Was this article helpful?
That’s Great!
Thank you for your feedback
Sorry! We couldn't be helpful
Thank you for your feedback
Feedback sent
We appreciate your effort and will try to fix the article